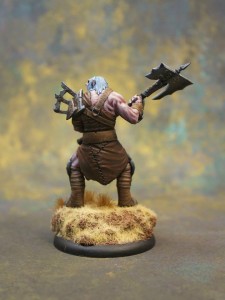
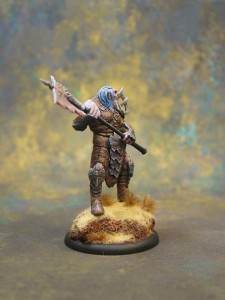
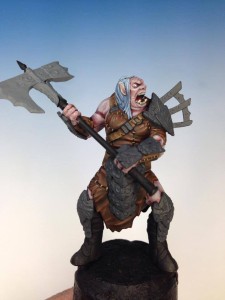
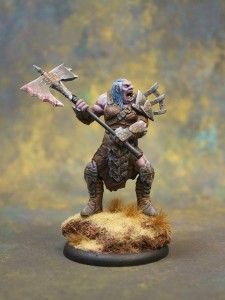
 We were recently commissioned to paint the Shadow Hold Female Troll from the Twelve Elements of War Kickstarter to a Display Standard.
The miniature itself is a finely detailed resin model supplied in two parts; the body itself and the arms holding the axe. Normally for Display Standard I would leave the parts in two pieces so that I could get to the models body parts covered by the axe, but this miniature’s the hand/axes is far enough from the body that we could assemble and paint it as one piece. I much prefer where possible to have the miniature in once piece as you can better judge where shade and highlights should be.
Before beginning painting, ensure that the model is cleaned (being resin, it also received a warm soapy bath) and glued together. It was then in black.
Step 1. Painting the Skin
I began by base coating the flesh areas in GW Rakarth Flesh. When painting to a Display standard, I normally water the paint down to the consistency of skim milk. It is very thin paint and normally takes several coats to cover the surface area, but achieves a very smooth and constent coverage.
Once the surface area is dry, I use GW Carroburg Crimson wash mixed 1:1 with water and coated it all over the flesh area. It was then allowed to dry and the same wash mix was the reapplied to ensure a neat coverage. This layer will form the shadows in the skin so I really tried to ensure that the second coverage of the wash was applied to areas where shadows would occur.
The next step was to take a 1:1 mix of Rakarth Flesh and Carroburg crimson (watered down) and begin to paint the raised areas and anywhere where light would hit the miniature. This highlighting was worked up through several mixes of increasing Rakarth Flesh until a 4:1 mix of Rakarth Flesh and Carroburg Crimson was achieved.
The final step was take a 3:1 water to GW White Scar white and apply it to the very peak of the highlighted area, paying particular attention to the face, hands and shoulder areas.
The steps for the flesh painting can be seen below
Step 2. Painting the Dark Leather Clothing
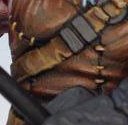
Tidy up any spillage from the skin on the clothing with black paint. Base coat all the clothing area in GW Mournfang Brown. Again, just like with painting the skin base coat, the brown was watered down to a skim milk consistency and multiple coats were painted on until a smooth base coat was achieved.
Once this base coat was dry, to assist in shadowing the clothing material and darkening the Mournfang Brow, I applied the GW wash Agrax Earthshade all over the clothing (no need to water this down).
The first highlight applied was Mournfang Brown (watered down with a 1:1 water mix).
The next highlights was to take the Mournfang brown and mix 2:1 with GW Balor Brown. Jeep adding Balor Brown to the mix and applying highlights until you achieve a 1:1 mix with Balor Brown and Mournfang Brown.
For the extreme highlights, take the previous 1:1 mix and apply a very small mix of GW Ushbati Bone to it (almost a 3:3:1 mix). Apply this extreme highlight to the very tips of the clothing and all the raised areas.
Step 3. Painting the Leather Straps
The Leather Straps and trappings on the miniature were to be painted in a lighter leather colour. This part of the miniature painting was rather simple in that you don’t want to have to many blends, but rather stark contrasts between the blends. That way it gives the leather that worn look.
The first water down down base coat was with GW Balor Brown (remember to reapply until it is smooth and is neat with the coverage). Once this was dry Agrax Earthshade was applied whilst using the brush to push the wash towards the bottom of the leather.
The highlights consisted of applying to the top of the leather; Balor brown, then a mix of Balor Brown with GW Ushabti Bone. Finally the very edges and any tears in the leather were highlighted with a watered down Ushabti Bone.
Finished Product:
The hair was painted in a dark grey color and the axe and other metals areas were painted using Non-Metal Metal techniques with a touch of rust and blood painted on for good measure. I won’t go into detail on how the Non-Metal Metal techniques was done, there are plenty of good videos and tutorials on the internet on this technique.
The final results should look something like this:


