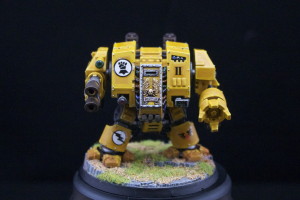
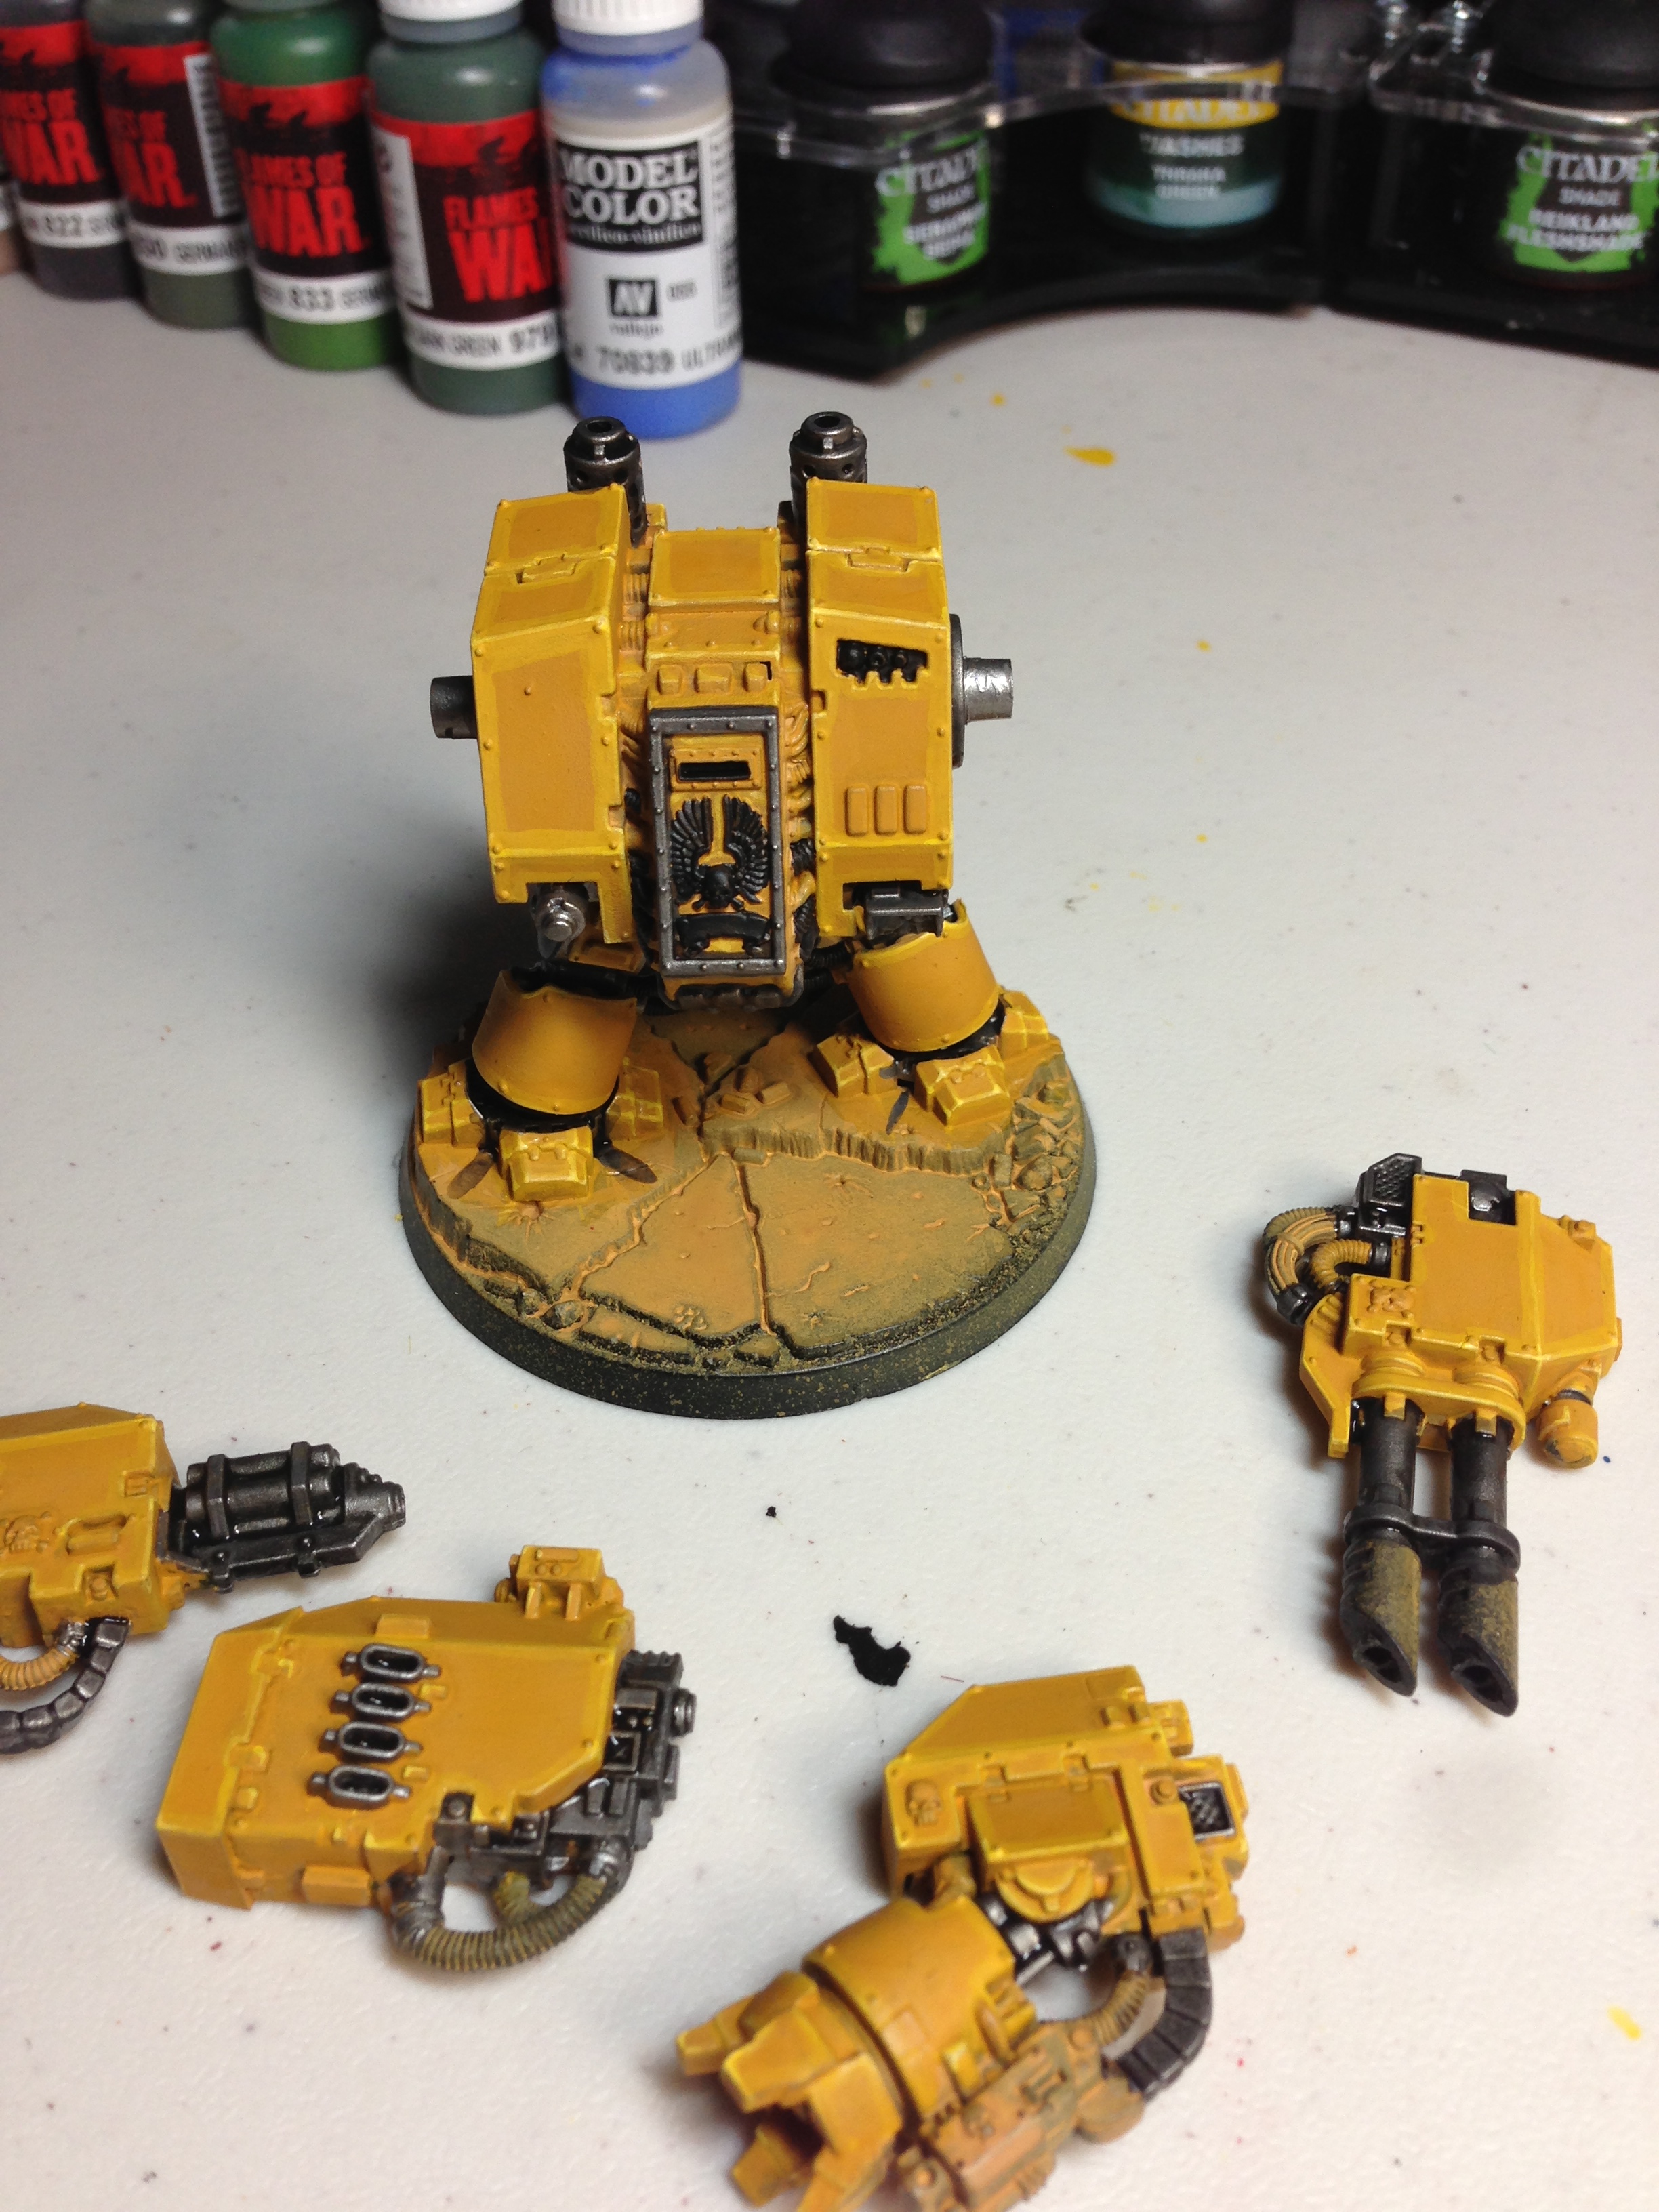
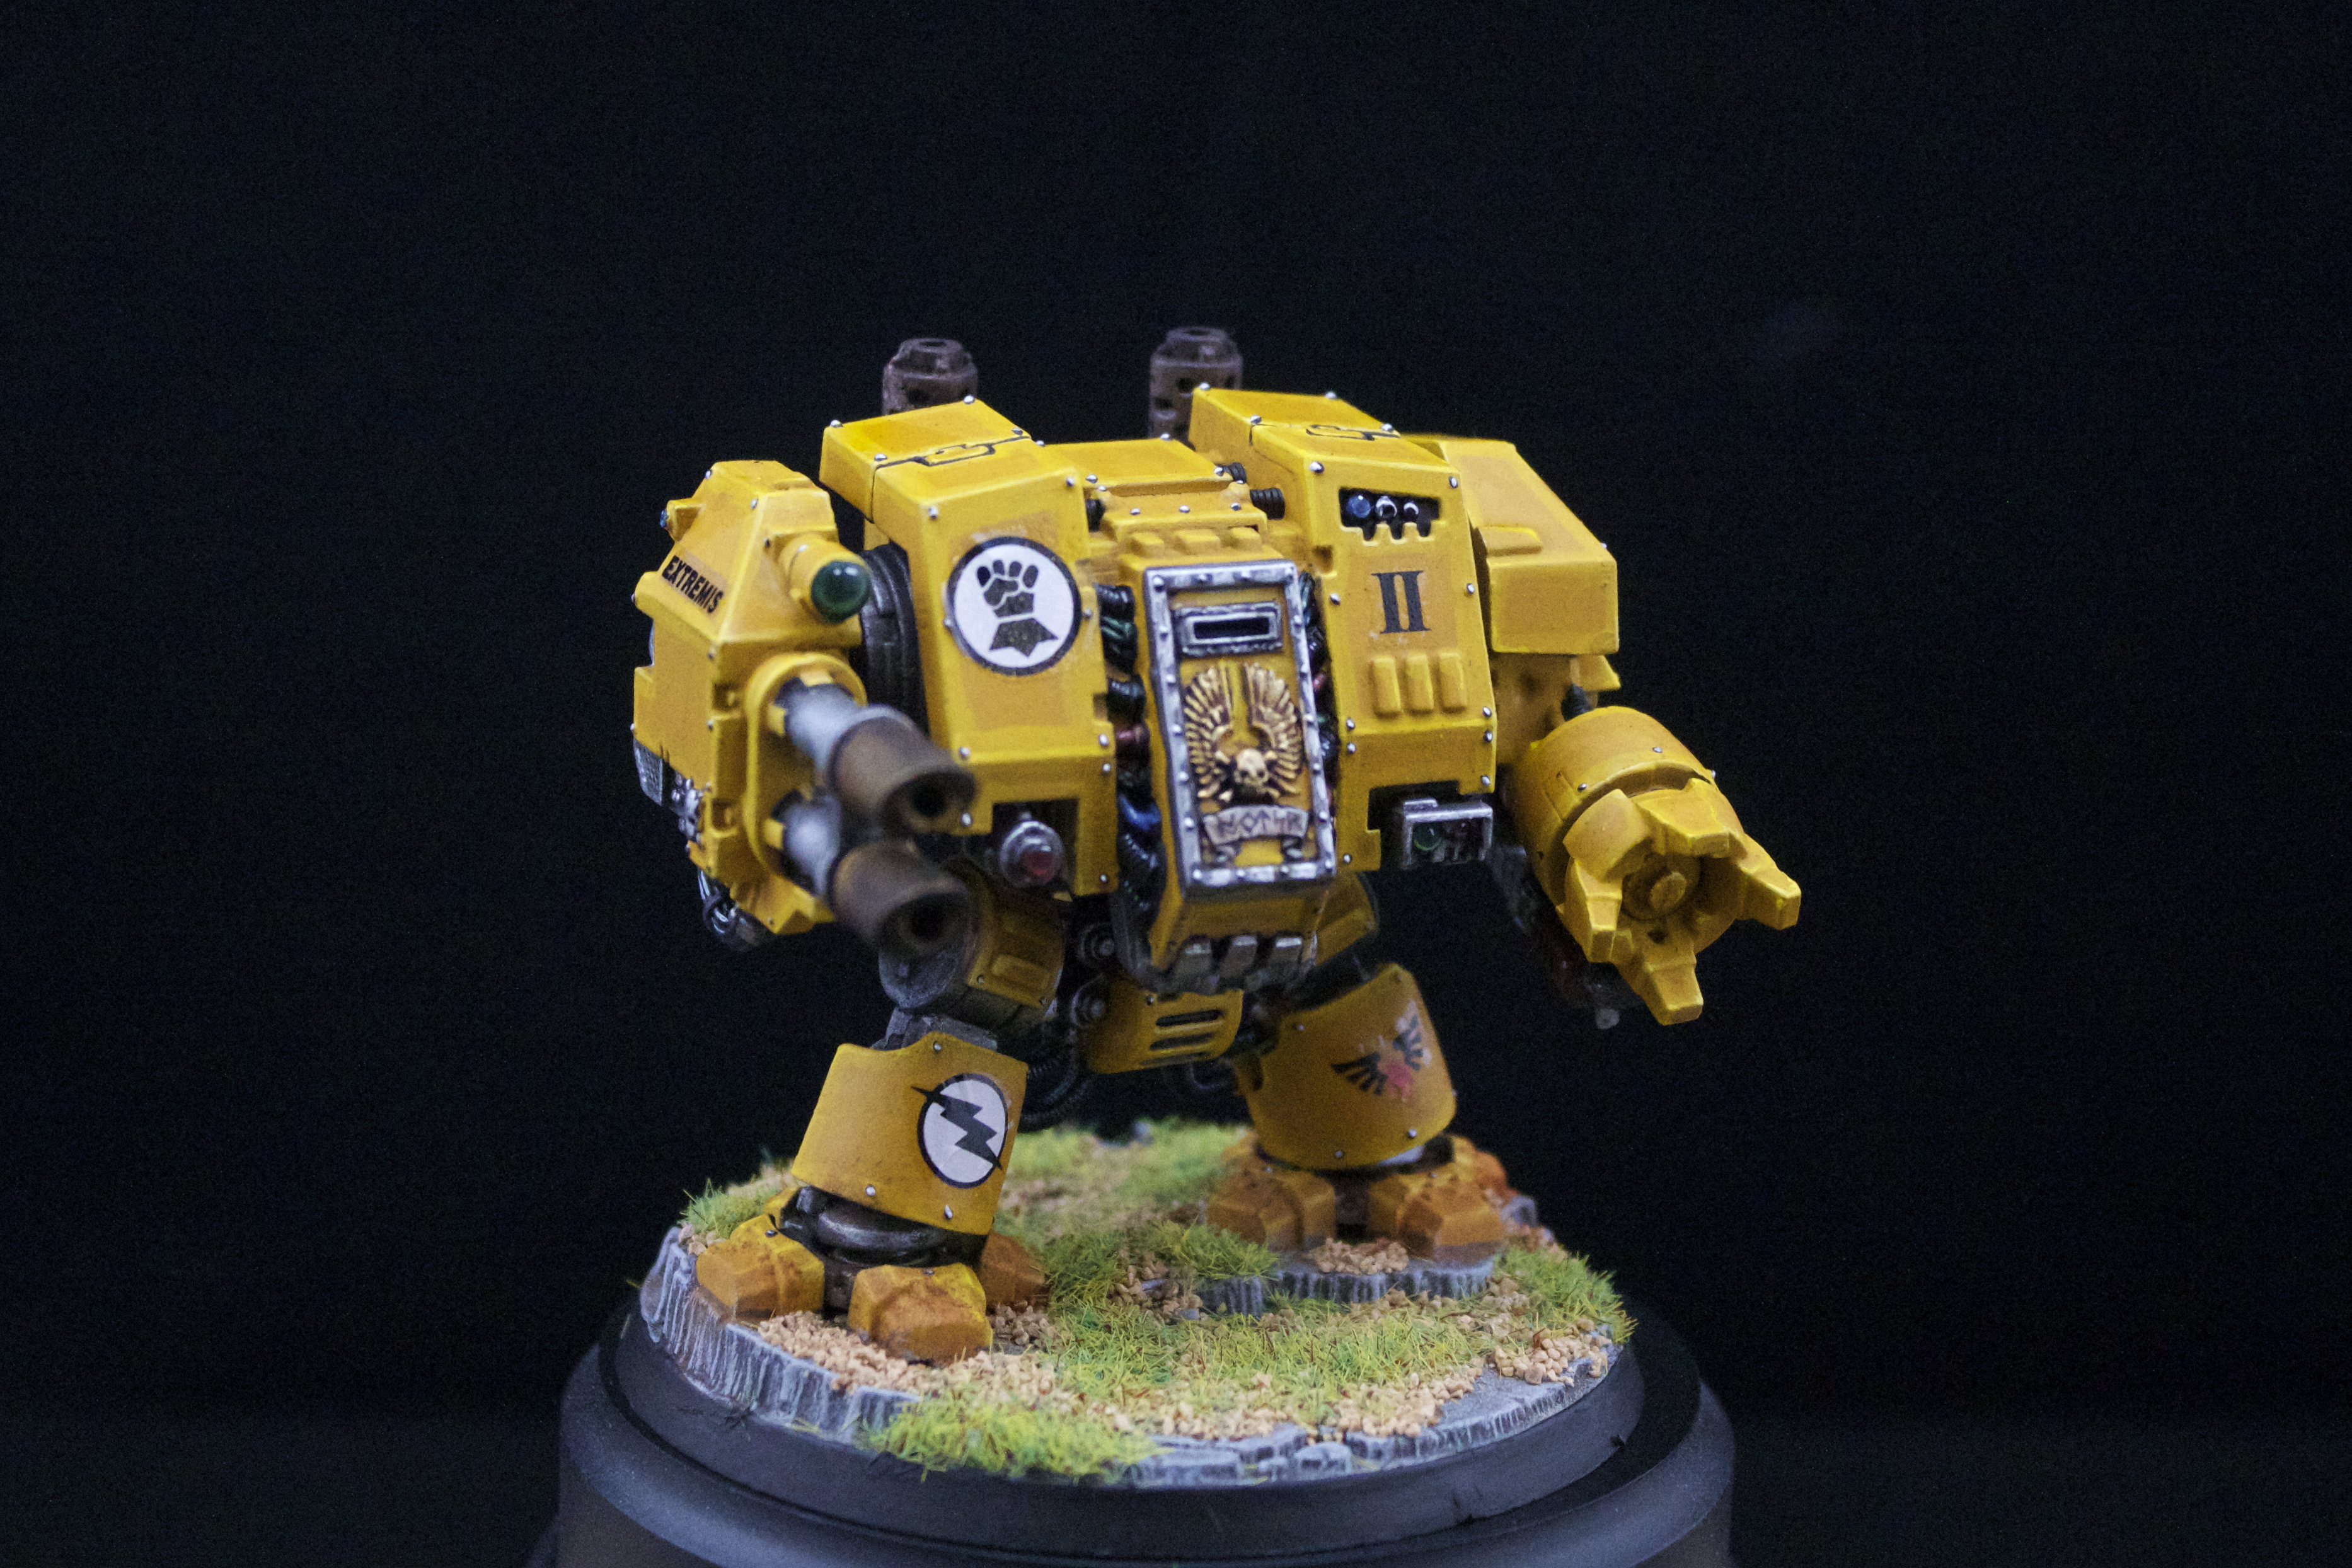
 The Imperial Fist dreadnought was painted to our standard painting quality.
This is a Painting Guide. In it we will go through a basic walk through on how to paint this vehicle up in Imperial Fist colors. This is not a step by step guide (which is another new type of guide which we will be bringing out shortly), and it is assumed that you have painted before.
Before beginning painting, ensure that the plastic model is cleaned and glued together. Keep the arms off and paint them separately. Undercoat all parts in black.
Step 1. Base coating and Highlighting the Yellow
Begin by base coating the model’s component which will be yellow in Games Workshop’s Balor Brown. Use several watered down coats (1/1 water to paint mix) and apply it with a large brush. Make sure you wait until each coat is dry before reapplying. Also ensure that it is watered down as you want a smooth surface – not a gluggy and pocked marked one.
Once the base surface is dry and you cannot see the undercoat underneath, time to mix the highlights. There will be two highlights applied. Mix a 1/1 mix of GW Averland Sunset and GW Yriel Yellow together. Apply some water to the mix (perhaps a 1/3 mix) just to ensure that the paint flows nicely and is not thick. Locate all the edges of previously painted yellow base (including anywhere where it seems metal armor meets metal armor) and use a GW Standard brush (a size 1) to apply a the highlight to those edges.
Once you have painted theses edges, hopefully there is some of the highlight mix left (if not, make a little more up) and this time add a 1/3 mix of GW White-Scar paint to lighten the previous highlight mix. Using the side of the brush, paint the very edges of the armor plates with this new highlight.
Once this highlight is completed and dry. Take GW White-Scar paint straight and apply it to the very edges again of the armor, though only the edges that are pointing above the model – this way it gives the impression that the light source (the sun, moon or explosions) are coming from above it.
Finally coat all the areas in GW Lamenters Yellow to soften the highlights and brighten the GW Balor brown.
Applying all the stage 1 colors and coating it with glaze

A close up to see the three yellow highlights after glazing
Step 2. Painting the Metal
Tidy up and spillages from the yellow coating with black. Base coat all the metal areas in GW Leadbelcher metal – again add a small amount of water (1/3 mix) to assist with making it a little more fluid and not too thick.
Once the base coat is dry, coat all the metal parts using GW Nuln Oil wash. You may want to initially start with a 1/1 mix of water and wash and coat all the parts, then when this is dry take the GW Nuln Oil straight and dab the wash into deeper holes/crevasses and at the edges of larger metal areas (at the end of gun barrels).
When the wash is dry, apply a 1/1 mix of GW Ironbreaker and water using the edge of your paintbrush to all the metal edges and tips to for your highlights. In the images of the dreadnought here, I stopped at this point. If you want to use a lighter metal for the very tips of the metal components as a last highlight, feel free to but bear in mind these parts are meant to be battle worn and dirty.

Close up look at the three part highlighting on the leg.

The edges of the gun barrel (where the metal meets other metals) is dabbed with additional GW Nuln Oil
Step 3. Painting the Exhaust Fumes
For the Exhaust fumes there are two methods that can be used. The first involves taking GW Nuln Old and applying it thickly to the edges of the exhaust ports and of the guns. Whilst the wash is still wet, use your fingers to smudge the wash around the part. Re-apply as necessary to thicken the layer.
The second way which is what has been used here is to use weathering powders (like those sold by Forgeworld or other third parties) and apply the black weathering powder using a dry brush to the ends of the exhausts and gun tips. Remember once you have the dirty exhaust look, don’t touch it with your fingers as you will remove the black powder form the model.
I normally leave this part until the end, that way I can varnish the model and seal the powder to the model (safe to touch without removing any of the powder from the model).

Apply black weathering powder to the ends of the gun barrels

Apply weathering powder to the ends of the exhausts
Finished Product:
Now all that remains to be done is painting the small details such as skulls (well it is a Games Workshop miniature), rivets and adding transfers. Your Imperial Fist dreadnought should now look something like the images below.


Pingback: Learn step by step how to paint an Ultramarine Dreadnought